How to Turn on Wifi Adapter on Windows 10
- MiniTool >
- MiniTool News Center >
- How to Enable or Disable Network Adapters on Windows 10?
How to Enable or Disable Network Adapters on Windows 10? [MiniTool News]
By Stella | Follow | Last Updated
Summary :
If you want to disable a network adapter (no matter it is a Wi-Fi adapter or an Ethernet adapter) you don't use or one that doesn't work, we'll tell you how to enable and disable network adapters with 4 different ways. Besides, MiniTool Software will tell you more tips and tricks about computer management, data recovery, file backup, etc.
A network adapter is used to connect your computer to the local network. If you want to surf the internet, you can enable network adapter. Sometimes, for some reasons, you want to turn off it.
But, some of you don't know how to enable or disable network adapter on Windows 10. In this post, we will show you 4 methods to enable network adapters for both Wi-Fi and Ethernet.

Wi-Fi stuck on checking network requirements? Two effective solutions can be used to solve this issue and they are introduced in this post. Get these fixes now.
These four ways include:
- How to enable or disable network adapters via Control Panel
- How to enable or disable network adapters via Device Manager
- How to enable or disable network adapters via Command Prompt
- How to enable or disable network adapters via PowerShell
You can choose one way based on your own wishes.
How to Enable or Disable Network Adapters via Control Panel
How to Disable Network Adapter
- Press the Windows
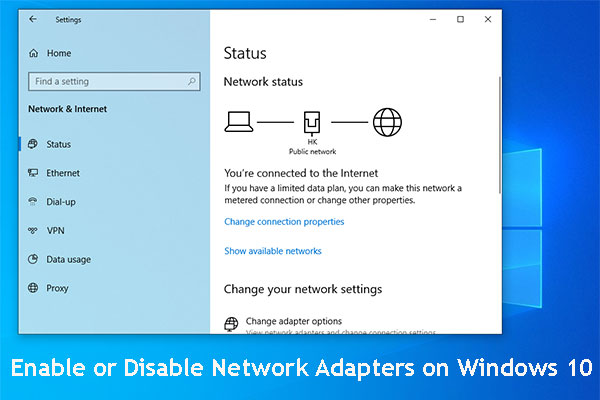
- Go to Settings > Network & Security > Status.
- Select Change adapter options.
- Right-click on the network adapter, and select Disable.
How to Enable Network Adapter
- Press the Windows
- Go to Settings > Network & Security > Status.
- Select Change adapter options.
- Right-click on the network adapter, and select Enable.
How to Enable or Disable Network Adapters via Device Manager
How to Disable Network Adapter
- Right-click Start and choose Device Manager from the pop-out menu.
- Unfold the Network adapters.
- Right-click the adapter you want and choose Disable device from the popup menu.
How to Enable Network Adapter
- Use the same way mentioned above to enter Device Manager.
- Right-click the needed adapter and select Enable device.
How to Enable or Disable Network Adapters via Command Prompt
How to Disable Network Adapter
1. Press Cortana and search for Command Prompt.
2. Right-click the top result and choose Run as administrator.
3. Type the following command and press Enter to show the name(s) of the network adapter(s) on your computer:
netsh interface show interface
4. Type the following command to disable the Wi-Fi or Ethernet adapter and press Enter:
netsh interface set interface "YOUR-ADAPTER-NAME" disable
Do remember to replace "YOUR-ADAPTER-NAME" with the name of the network adapter you want to disable. Unless there are spaces in the adapter's name, there is no need to reserve the quotation marks.
How to Enable Network Adapter
1. Use the same way mentioned above to run Command Prompt as an administrstor.
2. Type the following command and press Enter:
netsh interface show interface
3. Type the following command to disable the Wi-Fi or Ethernet adapter and press Enter:
netsh interface set interface "YOUR-ADAPTER-NAME" enable
Do remember to replace "YOUR-ADAPTER-NAME" with the name of the network adapter you want to disable. Unless there are spaces in the adapter's name, there is no need to reserve the quotation marks.
How to Enable or Disable Network Adapters via PowerShell
How to Disable Network Adapter
1. Right-click on Start and choose Windows PowerShell (Admin).
2. Type the following command and press Enter to identify the adapter's name you want to disable:
Get-NetAdapter | format-table
3. Type the following command to disable the Wi-Fi or Ethernet adapter and press Enter:
Disable-NetAdapter -Name "YOUR-ADAPTER-NAME" -Confirm:$false
Do remember to replace "YOUR-ADAPTER-NAME" with the name of the network adapter you want to disable. Unless there are spaces in the adapter's name, there is no need to reserve the quotation marks.

You can save all the commands you are running and the output to a text file in Powershell. Here is how to record Powershell command session Windows 10.
How to Enable Network Adapter
1. Use the same way to run Windows PowerShell as an Administrator.
2. Type the following command and press Enter:
Get-NetAdapter | format-table
3. Type the following command to disable the Wi-Fi or Ethernet adapter and press Enter:
Enable-NetAdapter -Name "YOUR-ADAPTER-NAME" -Confirm:$false
Do remember to replace "YOUR-ADAPTER-NAME" with the name of the network adapter you want to disable. Unless there are spaces in the adapter's name, there is no need to reserve the quotation marks.
Tips
You need to know that turning off the wireless connection using the network flyout doesn't mean that the Wi-Fi adapter is disabled. It only cut the connection between the device and the network.
The guide in this post focuses on the wireless and wired adapters. However, Bluetooth is also a networking device. Likewise, you can use the same operations to disable and enable its adapter.
How to Turn on Wifi Adapter on Windows 10
Source: https://www.minitool.com/news/how-enable-disable-network-adapters-win10-003.html
0 Response to "How to Turn on Wifi Adapter on Windows 10"
Post a Comment